 |
| Clan Members Clan History Clan Leadership Clan Timeline Friends of Dawn Newsletters Sketches & Visionstones Newbielympics Windy Titles Archives |
||
| Adventurer's Guides AlgyCam ClanLord Chat Clan Lord Links Clans Directory Date Details Maps Professional Skills Lists Toggle Locating Tips Trainer Messages |
||
| Clan Macros Clan Treasury Meeting Minutes Membership Intro | ||
The Adventurer's Guide to Roddingby
Hidden T. Thoom
About the AuthorHidden T. Thoom was born in the year 520 of the Ascendancy and is still not dead. He is widely regarded as one of the primary experts on rodding in the Lok'Groton island chains, and has helped countless expeditions get past tricky places like Hatred's Hollow and the Dreadwood. He is smart, suave, witty, comical, good-looking, and above all humble. In his spare time he enjoys hunting, sticking forks in electrical sockets, and generally hanging around being a pest. Frequently Asked QuestionsWhat is rodding?
Rodding is the act of using healing power to absorb damage from an attack
instead of having it deflected by a bricking fighter. It is useful against creatures that have
auto-hit attacks (such as Orga spell casters) and creatures that hit very accurately and very hard
(such as Angry Mother Sasquatches). In addition, it can be used to take some stress off of an
injured fighter in the middle of combat.
How does rodding work?
Rodding works by using the spirit training of the person taking damage (the point of the rod) to amplify the effects of healing them, allowing a greater rate of healing than damage taken. Since the speed bonus of Spirtus doesn't effect the healer's spirit drainage, it is useful for adding speed to healers otherwise not well equipped to deal with that kind of output.
What do I need to support a rod?
Not very much besides a working moonstone, caduceus, or mercurial staff and some common sense. As rod support, the point provides most of your Faustus, so as long as you have enough Higgrus and self-healing capacity to deal with slightly increased health drain, you should be alright. Depending on the situation, a caduceus may be required to rod for various reasons, such as mobility or splash damage (spread out over an area). In such situations, the usual amount of Proximus training needed to comfortably do your job is around 100 ranks.
Where do fighters figure into all of this?
As a fighter, your job is to protect the rod from any creatures who might get funny ideas about how the point might taste broiled with some tabasco sauce. How this is accomplished varies depending on the situation. If the rod is taking hits from a critter, your job is obviously to kill that critter, but you also need to think about the supporting healers and any critters that might wander on to them. You also need to be careful, especially if a large portion of the group's healing resources are diverted into the rod, since you won't get as much help if you are injured.
When the rod is taking damage from projectiles like rocks or lightning, your primary task is to keep monsters off of them, and projectiles on them. If something comes up in front of the rod, wait for them to move around it before attacking, and in places like Dread Passage where the projectiles (lightning in this case) bounce around, NEVER get too close to the point. Beyond that, stay on the far side of the rod so that you aren't targeted by the attacks, and pay heed to any directions they might give you. Der Wille Zur RodWhat do I need to be a rod point?
The basic requirement for entry into the rod business is around 200 trainings with Master Spirtus, though less will do in a pinch, and more is always preferable. Enough Higgrus or Histia to survive about 3 or 4 hits from a single creature, or at least three quarters of a full round of lightning/fire is also helpful. Beyond that, some skill is necessary, especially for the arduous task of lightning rodding.
The point does not necessarily need to be a healer, though there are some obvious advantages in that the healer skills Spirtus provides will be more useful, as well as the ability to self-heal. A fighter can act as a rod, though usually fighters have much better things to do than sit and absorb damage. A mystic with good health training would also be acceptable for the job, since Spirtus benefits Mystics a significant amount, with the caveat that health training is not exactly easy for a Mystic to stumble upon.
What is the most effective way to train?
While there is no single "best way," a great way to train as a rod is to take the basic Eva-healer template and swap Spirtus for Eva. Their teachings are similar to quite a large extent, except that Spirtus gives much less health training. To that end, for every 10 spirtus you should probably be training 5 higgrus and 5-10 respia, to taste. You should reach second circle fairly quickly, where you should train 20 or 30 ranks of Awaria to help support your self-healing skills (which takes some of the burden off of your support).
By the time you pass 3rd circle you should have a pretty good idea of what you're doing and what you want to train. 100 proximus is a good investment for keeping your support healthy in areas in which they can't stand next to you, but is by no means absolutely required. Basic TacticsWhen rodding beasts...
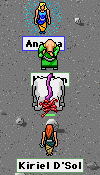
Stay next to it!
This probably goes without saying, but if you're supposed to be taking damage from something, pretend it's a gigantic vicious teddy bear covered in painful spikes and snuggle up to it like you're afraid it will leave you. If it focuses on someone else, and they start running away, try to intercept. When it swings at you, it will become distracted and target you again.
Don't be afraid to take a few swings.
Since you have a legitimate reason to be up close and personal with Mr. Monster over there, feel free to take out a good bit of your repressed anger on him. A quarterstaff is suggested for this, due to the satisfying smack it makes when you whack something with it, as well as the number of swings you can pump out with it, making it more likely you'll hit the monster and take a share of the experience for the kill.
Mind the Bladers!
If there are any people using a fell blade in your group, take special care to stay on the same side of the monster so they can have a steady target for its backside. If necessary, you can even adjust your position to better aim it at them. If anyone around is using a blood blade, be extra careful not to back off from dangerous targets, or else you may find yourself paying their medical bills, or worse, waiting for them to come back from an extended visit to Purgatory.
When rodding projectiles...Stay up front!
Most projectile-throwing monsters have a very simple algorithm in which they simply aim at the nearest exile. That should be you as much of the time as possible. Always keep an eye out where things are coming from, and stay between them and the bulk of the group. If necessary, direct the group on where to stay relative to you, since not all of them may have time to pay attention to the finer points of the painful hailstorm coming down on you.
Don't move too fast!
Especially when being cadded, moving too fast ahead of your support can cause loss of healing power, which in itself can be deadly. It can also hurt your support, denying them the capacity to get back on you, which may cost your life.
If creatures get in your way...
...move around them so the fighters can get at them without exposing themselves to the enemy fire. If there's splash damage to worry about, move ahead a small burst of about an exile's width so that the creature will concentrate on the fighter and they won't be hit by the projectiles.
When everything goes to hell...Cover the rear!
Since you've been getting healed all this time, you're probably still fairly healthy, and thus should be the last one to exit the snell, providing cover (and being cadded if possible) 'till the very end.
Play tie-up games!
Since you'll be the last one out of the snell, it's also a good idea to keep a chain handy for the last few stragglers who don't quite exit fast enough. Your training is ideal for it, especially if you have a sylphstone ring.
When running...
Sometimes when attacked by a set of strong beasts such as cave cobras with nowhere to retreat, or while exiting a dangerous snell like Hatred's Hollow, you will find yourself running alongside a cadder who is healing you. To maximize the effect of this tactic, run as close as them to you can while still protecting them. Let them lead, and follow their directions. This allows you to stay up much longer and guarantees you'll have a better chance of surviving.
Advanced ManeuversSwingingSometimes when holding a point as a rod, it will be necessary to move back a bit in order to advance; this is called "swinging." If you are being cadded, let your cadders lead the backtrack before resuming control to move forward again, always staying between them and the source of damage. A skilled enough rod will maintain full stability and power during this move. If you are being moonstoned, this gets much trickier. Wait until you see a salvo of projectiles on the edge of your screen before beginning the swing, and pull ahead of your support so you can arrive first at the next destination and continue covering the party as soon as possible.
BreakingWhen rodding a strong beast with a projectile attack such as a Mud Golem or Angry Mother Sasquatch, it is common practice to take a short break periodically during the fight and have the rod run the critter around to avoid anyone taking the significant damage of the rock, mud ball, etc. This is usually done by having the rod, once the beast is discovered, start running it in circles, calling out "rock" (or simply "r") when it uses its projectile. They then lead it back to the group and fighters pound on it until someone who has a good idea of how often it throws calls "break". At this point everyone but the rod stands a safe distance away from the beast and the rod begins the circle run again. They once again call "rock" and this process repeats itself until the beast is vanquished.
'ZuingSome critters are too strong for the average party in their area (such as Orga Hatreds in Hatred's Hollow) and need to be contained by a shield of Kudzu so that they don't hurt anyone. A rod is usually put in place to hold off the attacks while a kudzuer plants seedlings all around it. When the Kudzuer is almost done, there may be a gap large enough for the critter to escape through left open. In such a case, have someone stand on the other side of the 'zu to distract the critter while you move to a gap between two other plants to continue taking hits while the kudzuer plants the final seedling.
Area-specific GuidelinesThese are general guidelines to the rodding requirements of various areas throughout the Lok'Groton Island Chain.
Splash DamageThe following areas have splash-damage-dealing projectiles, and thus should be rodded with cad support only:
BreakersThe following areas have creatures that throw projectiles worth breaking to dodge.
General Strength RequirementsRough estimates of the amount of strength needed to rod a given area or creature.Lightning Areas
Strong Creatures
There you have it, a basic guide on rodding. Now go, be merry, and get the crap beat out of you for the good of Puddleby!
|
Corrections, questions, etc. regarding these scrolls should be sent to Kiriel D'Sol.

